Scenario Manager in Excel A Step Towards Advance Excel (Revised)
On Scenario Manager, I have already written an article but that was not properly presented and had some confusions. After getting review from some users, where they suggested that if this article was properly presented this could be more meaningful. Therefore, from the reader prospective I again submitted to get detailed understanding and identify why we need to learn “Scenario Manager Function in Excel”
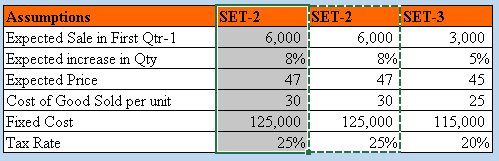
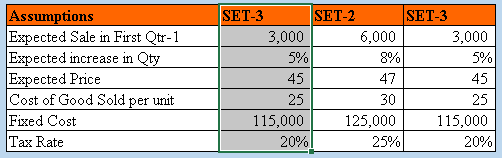
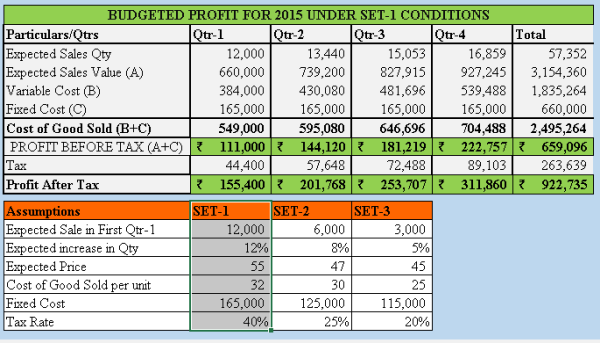
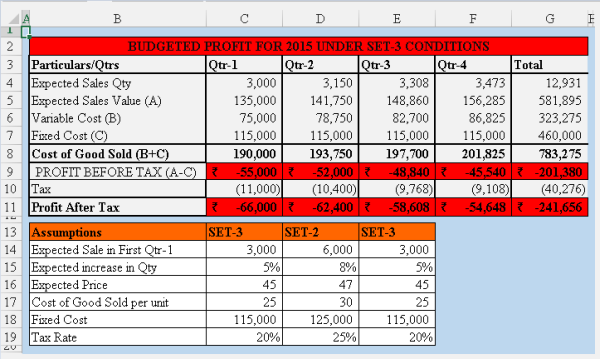
Scenario Manager Function attempt to diagnose the problem of redundancy work when we have to generate meaningful reports from multiple variable inputs. For example, suppose we require to prepare a report of BUDGETED PROFIT OF 2015 under different input which have tendency to change as mention in below snapshot. (Budgeted Profit is calculated under Set-1 conditions)
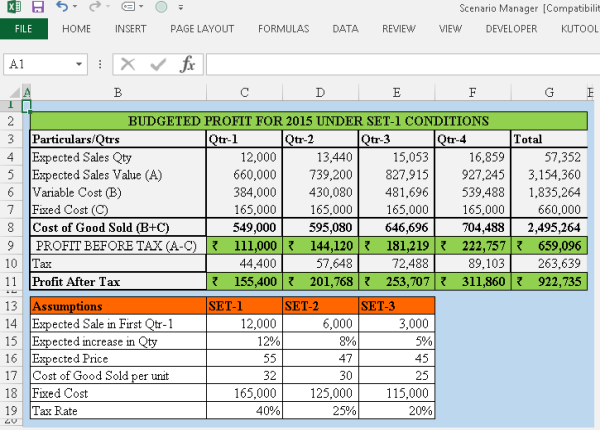
As you can see we have to calculate the BUDGETED PROFIT UNDER SET-1, SET-2 AND SET-3 and if we go with traditional method we may require to prepare three reports separately. But if we know function called scenario Manager there is no need to prepare three reports separately.
Note 1: Before proceed with this article please download the basic file from this source link Scenario Manager In Excel Revised. The purpose is to simulate this article with the practical situation.
Now let see how it works
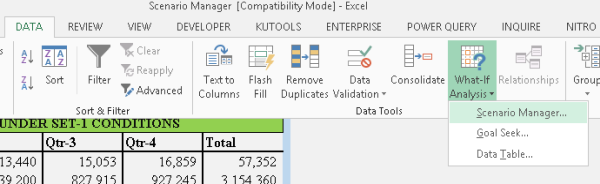
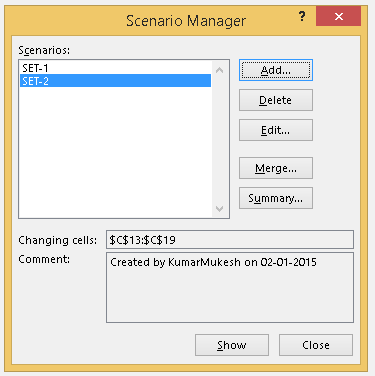
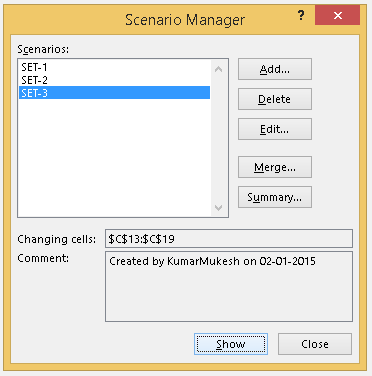
STEP 1: Go to "DATA TAB "and select "What if analysis" then "Scenario Manager"
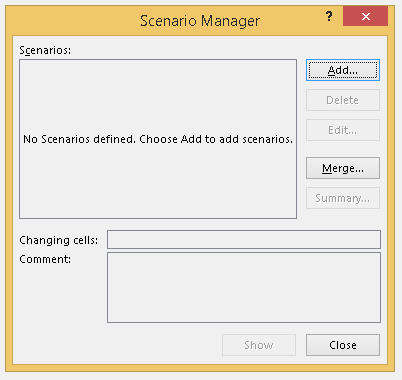
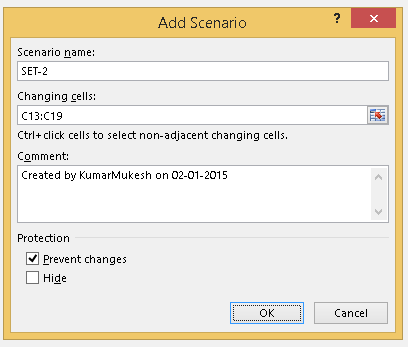
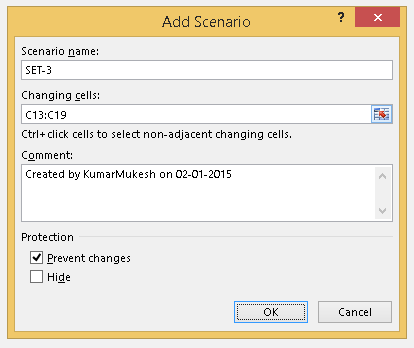
STEP 2: Click "ADD"
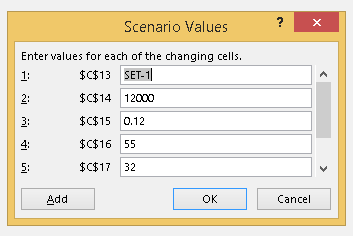
STEP 3: Name "Set-1" as Scenario Name and select "$C$13:$C$19" as Changing Cell
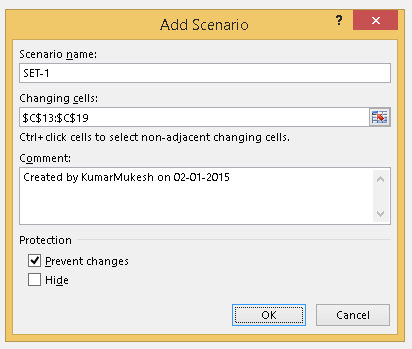
STEP 4: Click "OK"
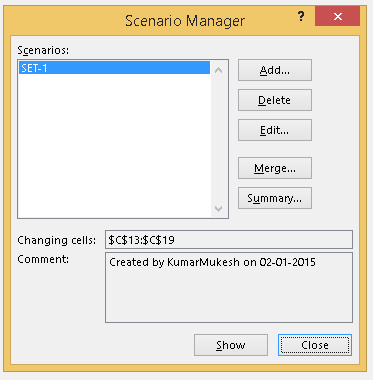
STEP 5: The next scream will be llok like that and then click close
STEP 6: Copy the area of "Set -2" and paste it on Area of "Set-1"
STEP 7: Follow the step mention in "STEP 1" once again and click add
STEP 8: Name "Set-2" as Scenario Name and select "$C$13:$C$19" as Changing Cell and click "OK"
STEP 9: Click "OK"
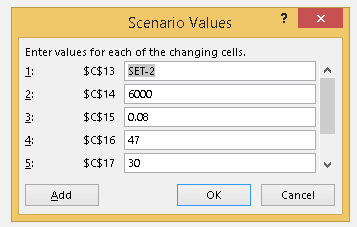
STEP 10: The next scream will be look like that and click "Close"

STEP 11: Copy the area of "Set -3" and paste it on Area of "Set-1"
STEP 12: Follow the step mention in "STEP 1" once again and click "Add"
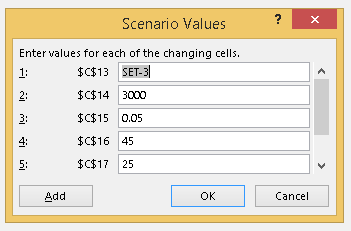
STEP 13: Name "Set-3" as Scenario Name and select "$C$13:$C$19" as Changing Cell and click "OK"
STEP 14: Click "OK"
STEP 15: The next scream will be lool like

STEP 15: Select "SET-1" and click "Show"
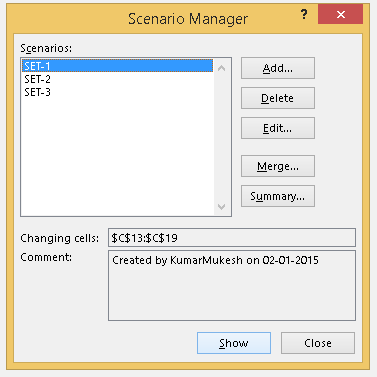
Now you will see that all figures are updated according to the conditions of Set -1
STEP 16:: Select "SET-3" and click "Show"
Again you will see that all figures are updated according to the conditions of Set -3
I like to read the comments from you, if you like, dislike or have any query about scenario manager or other functions of Excel
Regards,
KumarMukesh
camukeshkumar@consultant.com


 CAclubindia
